Import or open a project
You can start from an example project that ships with an SDK, or open your own project. The extension supports CMake and Make projects.
Import an example project
Example projects are included in most SDKs. Install an SDK first.
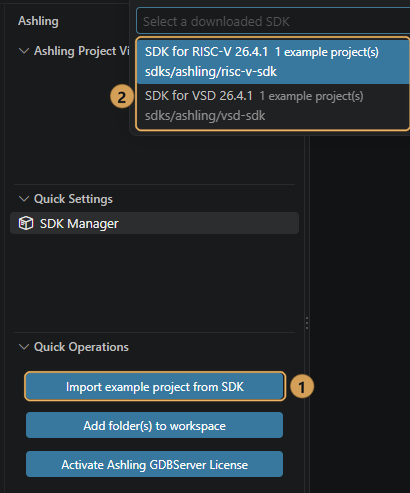
- Select the Ashling icon in the Activity Bar.
- Under Quick Operations, select Import example project from SDK ①.
- In the list headed Select a downloaded SDK, select the SDK ②. Each SDK shows how many example projects it has.
-
In the list headed Select an example project, select the example. Each example shows the SDK it comes from.
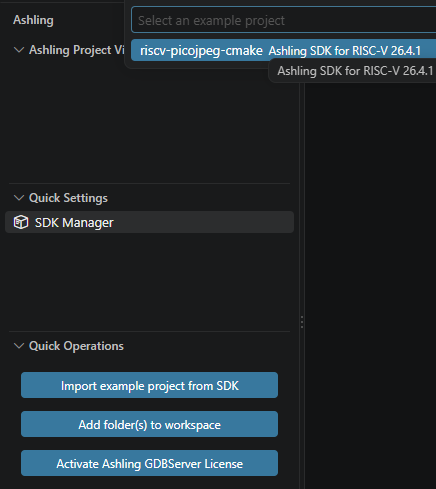
Import example project (2/2): pick the example. -
In the Choose where to import '<example name>' dialog, browse to a parent folder and select Import '<example name>' here. The example is created in a new subfolder with the example's name.
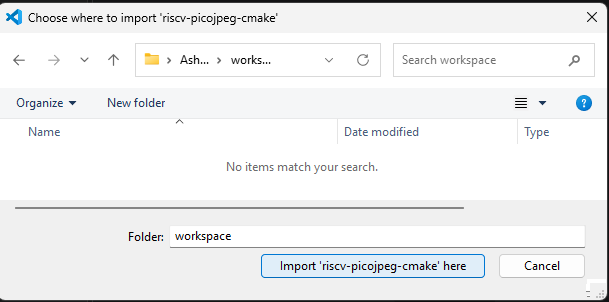
Choose the parent folder for the example.
The example is added to the folders open in VS Code (your workspace) and appears in the Ashling Project View. The SDK you imported it from is selected for the project automatically, so you can build it straight away.
Note
If a folder with the example's name already exists in the location you chose, pick another location, or open the existing folder with Add folder(s) to workspace.
No examples listed?
- If you see the message No SDK installed. Samples are provided by an SDK., select Open SDK Manager and install an SDK that includes examples.
- If your SDK isn't in the list, it has no examples. Ashling SDK for Arm AArch64 doesn't include any; see Supported SDKs.
Open your own project
- Select the Ashling icon in the Activity Bar.
- Under Quick Operations, select Add folder(s) to workspace. You can also use File → Open Folder…, but that closes the folders already open.
- Select the project's root folder — the folder that contains its
CMakeLists.txtorMakefile.
The folder appears in the Ashling Project View. Next, select an SDK for it.
You can have several projects in one workspace. Each one has its own SDK, build actions and debug configurations.
How the project type is detected
When you select an SDK for a project, and again when you build, the extension looks at the files in the project's root folder:
| The root folder contains | Project type | Built with |
|---|---|---|
CMakeLists.txt |
CMake | CMake Tools |
Makefile, makefile or GNUmakefile (and no CMakeLists.txt) |
Make | Makefile Tools |
If both a CMakeLists.txt and a Makefile are present, the project is treated as a CMake project. A folder with neither is also treated as a CMake project, so its build fails because CMake finds no CMakeLists.txt; add the folder that holds the build files instead.
Projects in subfolders
Detection only looks at the root of each workspace folder. If your CMakeLists.txt or Makefile is in a subfolder, add that subfolder to the workspace instead.
Remove a project from the workspace
Right-click the project in the Ashling Project View and select Remove Project from Workspace. The project's files are not deleted.
Next step
Imported an example? Its SDK is already selected, so build it . Opened your own project? Select an SDK